Teaching your puppy place can be a valuable tool for so many reasons. Place can be used for safety while you are cooking dinner to ensure the puppy isn’t under your feet. It can also be used while you are watching TV with the family to keep an eye on them, during dinner time so they aren’t begging at the table, and even as a routine for greeting guests entering the home.
To get started, you will need:
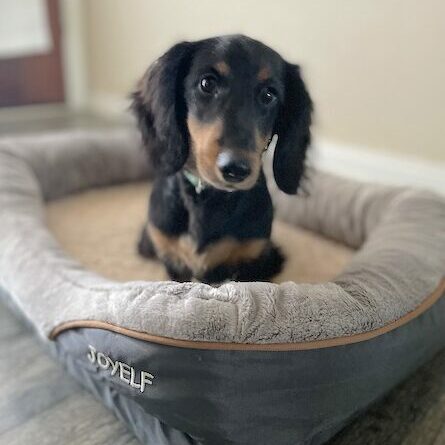
- A bed with elevated sides or the highest elevation possible.
- A properly fitted collar
- A flat 6ft leash
- Kibble or treats
Check out our Puppy Supplies List blog for links to these supplies we recommend and more!
Getting Started
When teaching place, you’ll want to break up your training into two main goals:
- Sending to place
- Staying on place
Sending to Place
- You’ll start by using a lure (a treat in your hand). Stand right next to the bed with your palm down and the treat right in between your thumb and pointer finger. Start with the treat in front of their nose, and using the hand closest to the bed, move your hand in a pointing motion over their bed.
Trainer Tip: If your puppy won’t follow a lure, start by simply tossing the treat on and off the bed. Then go back to a lure when they are ready. If you have a toy breed, we’ve listed some additional adjustments at the end of the blog for you.
- As soon as all four paws are on the bed, bridge “good” and treat.
- Immediately after, say “free” and toss a treat close by and off the bed. Keep your feet planted. If your puppy is struggling to get off the bed, you can clap your hands to coax and teeter away from the bed, or use a gentle pressure on the leash to help get them up. This is 1 trial.
- Repeat the trial again until your puppy is successful for at least 3-5 trials in a row.
- After the dog is consistently and quickly going to place, begin to fade the lure into a hand signal.
- Try to keep the same pace of sending. While in rhythm, keep the same motion moving across the bed except with no food in it, and instead feed with your OPPOSITE hand. Make sure you are hiding your food behind your back so that the puppy isn’t staring at it and is following your hand signal instead.
- After 3-5 trials of a hand signal and feeding out of the opposite hand, put the food into a treat bag to make it more realistic. Do 3 more successful trials. Be sure to remember to “free” after each trial.
- Once your puppy is getting this, you are ready for a verbal command! Continue with the same rhythm as before, but now, do not use a hand signal at first. Keep the energy high and say their name and then “place”. If your puppy goes on the first verbal, bridge “good” and deliver a treat. If your puppy doesn’t get it on the first try, deliver a hand signal 1-2 seconds AFTER saying “Fido, place”. Remember, the goal is to not use the hand signal.
- Once your puppy has gotten the ‘sending on a verbal’ consistently, you can start moving a bit farther away from the bed. Take one step away, and when prompting the next trial be sure to have your feet planted prior to asking them to “place”. Continue moving farther back one step at a time until you are at the desired distance goal to send your puppy from.
- If your puppy is having a hard time as you are creating distance, don’t move toward the bed until the hand signal has been used twice. If you need to move closer to the bed, do so and deliver another verbal prompt FIRST, and then a hand signal only if needed.
Staying on place
We are now going to focus on adding in the 5 D’s:
- Distance – How far you send your puppy, or how far you move away from them.
- Duration – How long your puppy is staying in place for.
- Distraction – Any sights, sounds, and stimuli around them.
- Direction – Sending your puppy from different sides, or you moving in different directions.
- Disappearing – Going out of sight (one of the most difficult!).
Practice adding these in and making them more difficult one at a time. As your puppy becomes more successful, you can add in more of the D’s. If you find your puppy is struggling, you may need to decrease one or more of the D’s.
- Send your puppy to “place”. Stay stationary, and begin bridging and treating immediately. Then start spacing out the treats every 2-3 seconds, then 5 seconds, 10 seconds, and so on.
- Start easy by standing in place and moving your feet slightly, then break eye contact. Next, start to turn your back and begin to move away.
- Begin adding in those 5 D’s: distance, duration, distraction, direction, and disappearing. Always bridge “good” and feed at the exact moment it is most difficult for your puppy. Example: When you walk 10ft away from the bed, bridge “good” at the 10ft mark, walk back to them, and then deliver a treat.
How to Fade Out Food
Once your puppy is consistently going to place after 10 trials, begin fading the food out with two methods.
- Begin to add in praise, petting, and play as reinforcement instead of food.
- Change up how often or on what rep you are rewarding your puppy with a treat.
- Feed on the 2nd or 3rd rep, then feed on the 1st rep, then the 5th rep. You’ll want the reward schedule to be “random” so that your puppy cannot predict when food is coming.
Think of the above sort of like a slot machine. The exciting part about pulling that lever is the anticipation that you MAY hit a jackpot. If you knew you were going to get a reward every single time you walked up, you aren’t going to be as excited to engage in the behavior again, and the reward may not be deemed as valuable. Randomized reinforcement schedules have been shown to be an effective way to both reinforce AND maintain behavior for long periods of time.
How to Practice Adding in Distractions
Allow a distraction to be present and your puppy to get interested, then prompt to place. When your puppy is successful, bridge “good” and feed for the new distraction. If your puppy is unsuccessful, free them, and try again. If they are unsuccessful for more than 3 trials, reduce the intensity of the distraction or check out our “Troubleshooting” section below for other adjustments.
After your puppy is successful, increase the level of distraction prior to the prompt. Allow your puppy to get distracted and then prompt them immediately. Continue prompting and releasing as many times in front of the distraction as possible. As compliance increases across different distractions, you can begin slowly adding in the other D’s. If your puppy doesn’t comply, try to repeat with distraction in view until they are successful!
Troubleshooting
- Keep your puppy hungry and motivated before you practice.
- Use a higher value treat.
- Reward more often.
- Decrease the difficulty of your D’s.
- Keep it fun! If your puppy is struggling, take a break and play with them for a minute.
- Keep your goals attainable. Aim to send them right next to the bed to start, and have them hold for 30 seconds-1 minute, then gradually increase from there.
- Always end on a successful rep.
Adjustments For Toy Breeds:
- You may need to start off teaching them to send by kneeling on the ground near the bed.
- If your toy breed is avoiding the bed, try to make the “bed” less difficult by ensuring it is the right size for them.
- You can teach your toy breed to “place” on a chair or couch space by picking them up and placing them on it, and then working on holding that spot until you have released them.
We are so excited to be able to give you some tips and tricks on how to start teaching your puppy the “place” command! If you have any questions or are looking for a more hands on training experience, we highly recommend reaching out to a local behavior modification and certified dog training team in your area. With multiple locations nationwide, we are ready to help! For your Houston and Woodlands team, contact us here.